After receiving the laser marking machine , many companies found that the actual printed mark was inconsistent with the red light range during the marking process. At this time, many people are helpless. In fact, it is very simple. Here, Junchuang Laser will share with you a method to solve the problem of the actual printed mark being inconsistent with the red light range.
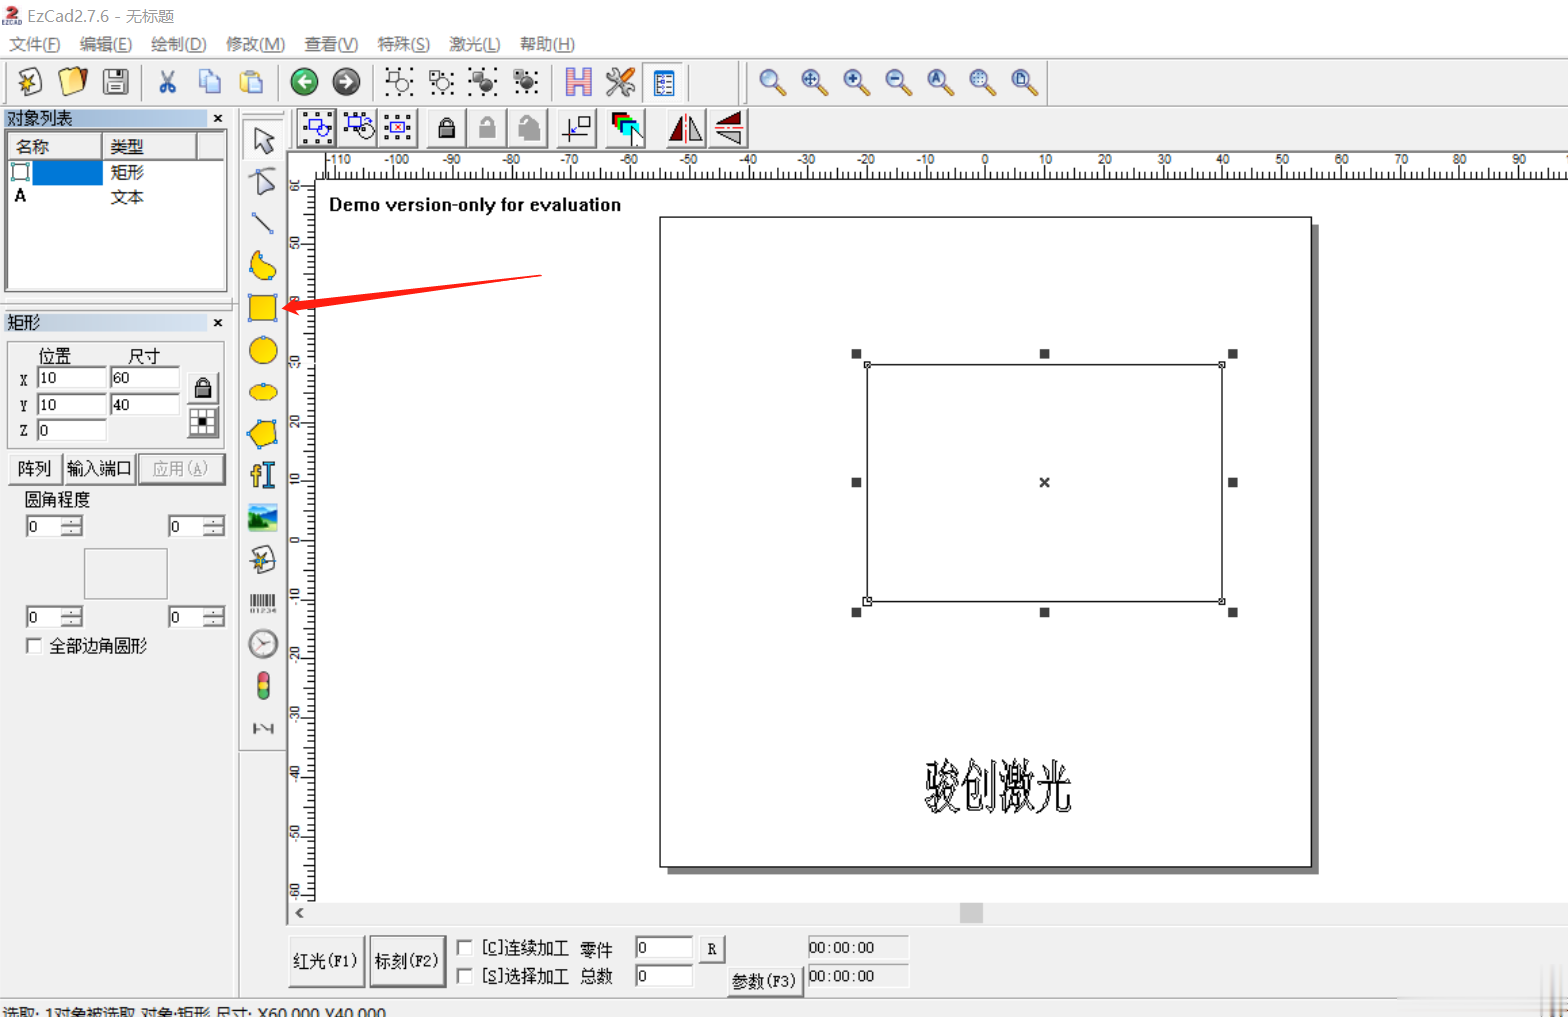
1. We first use the rectangle tool of the laser marking machine software to draw a rectangle in the working area, that is, a rectangle or a square is fine. Here we draw a 60mm*40mm rectangle (a 4-sided rectangle is fine). Then we turn on the engraving button of the laser marking machine to engrave on the demonstration workpiece.
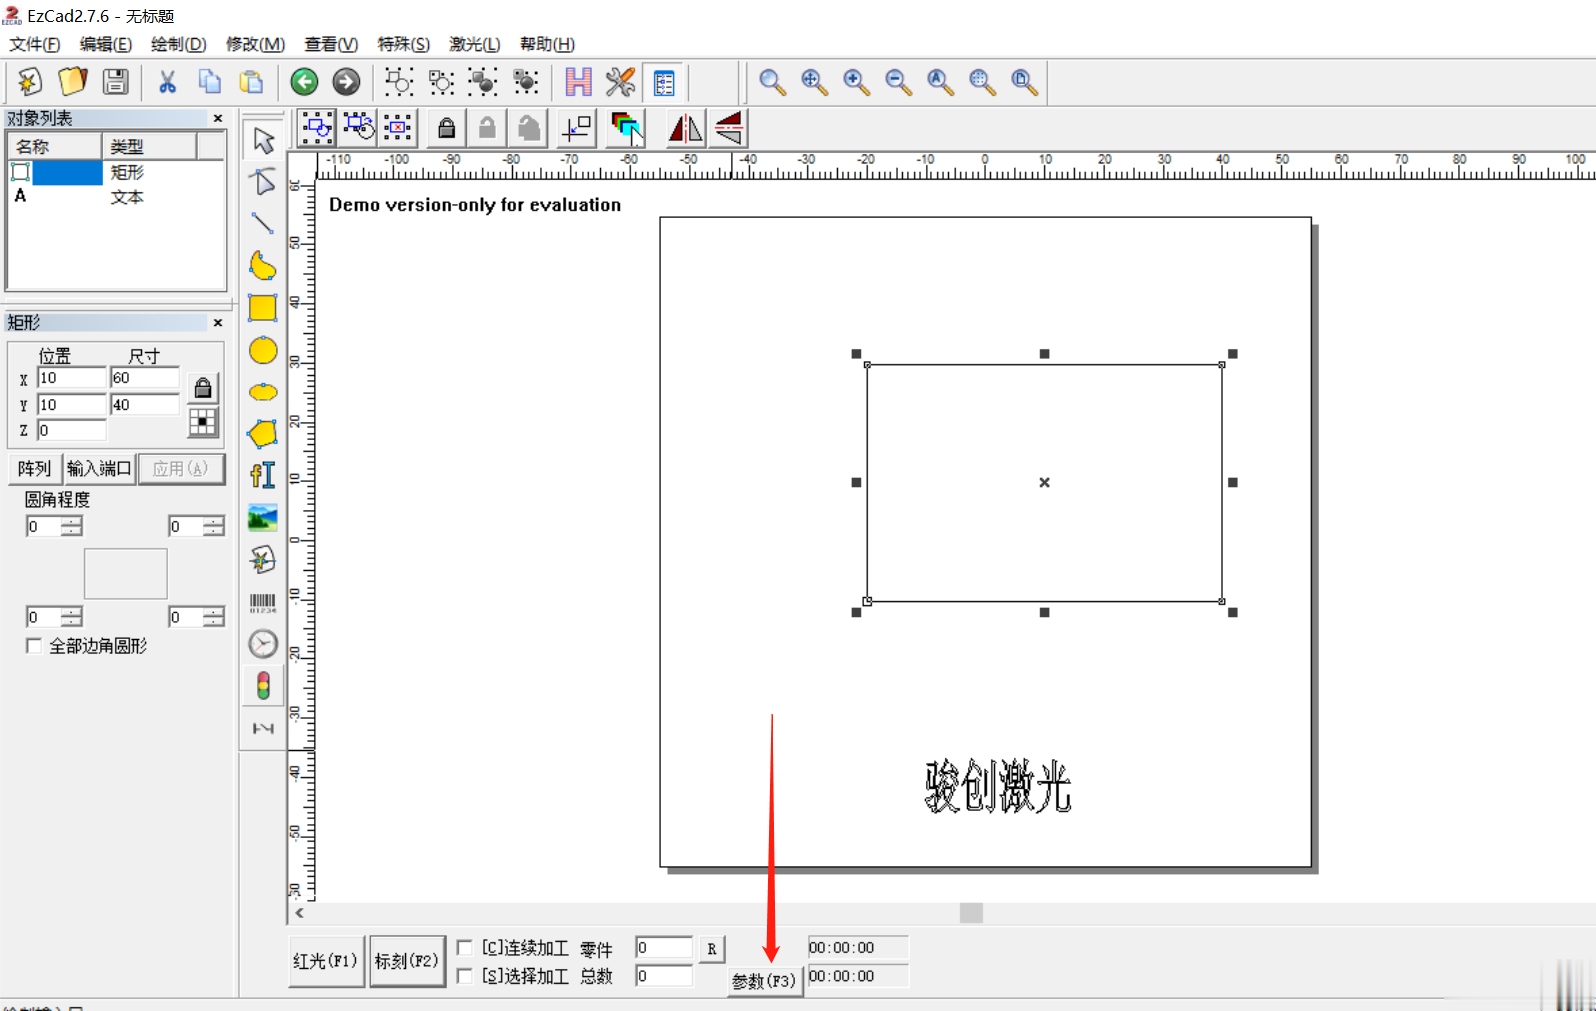
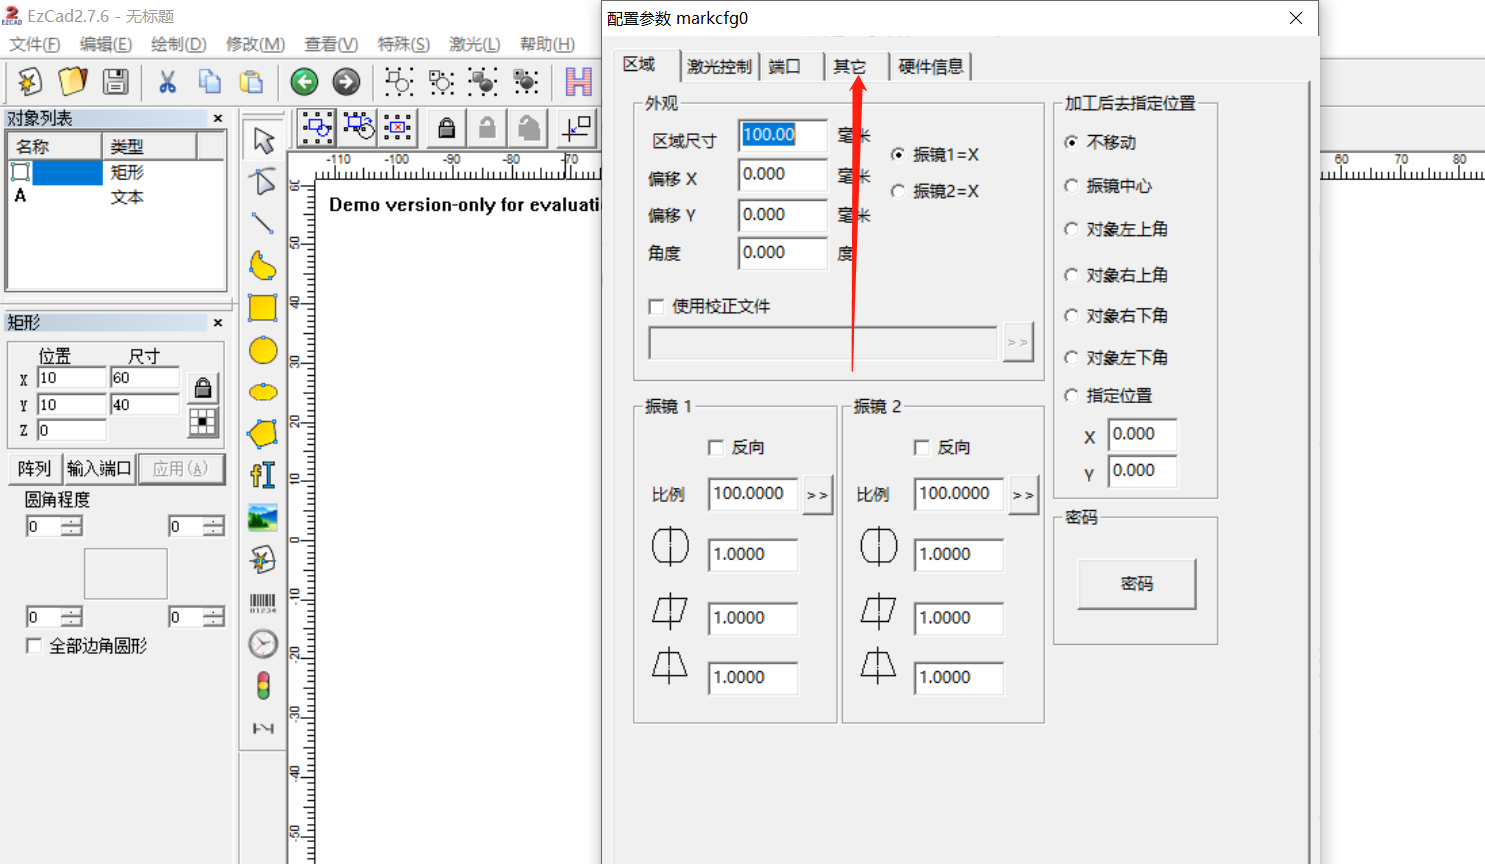
2. After engraving, we get a rectangle. At this time, we do not move the workpiece. We turn on the red light and find that both the x and y axes have deviations. Then turn off the red light and enter the parameter setting of the marking machine (as shown below).
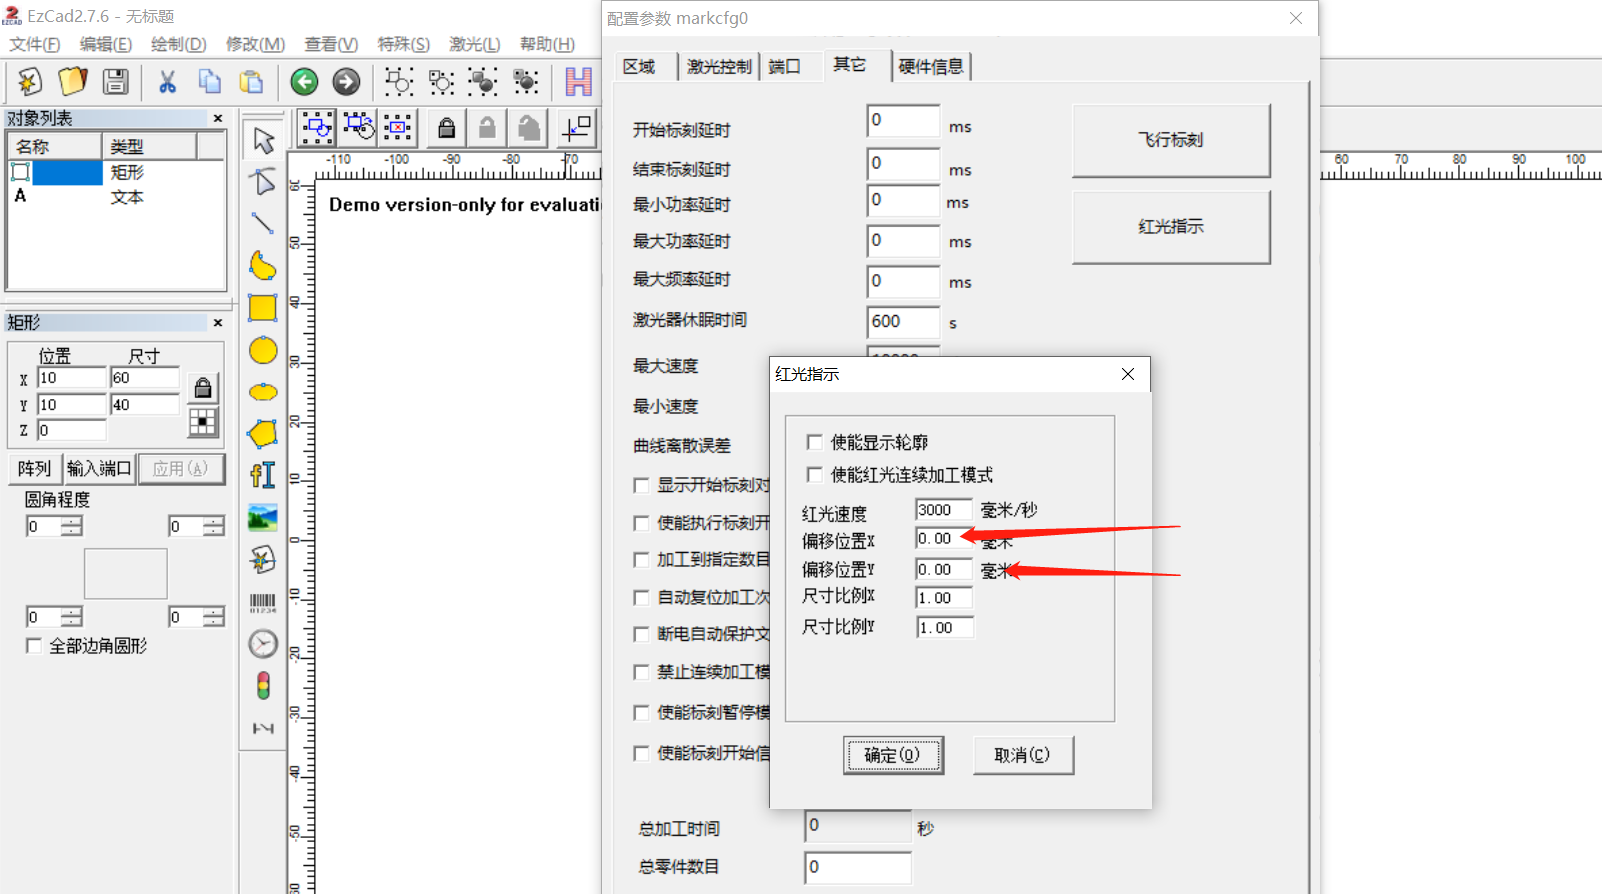
3. Then we open the other options and click on the red light indicator. Here we can adjust the speed of the red light and the deviation of the red light. We only need to adjust the offset position x and offset position y. After each adjustment, return to the software interface and turn on the red light to see if the red light overlaps with the adjusted line. If it overlaps, it proves that it is adjusted well. You can adjust it several times according to the actual situation.

The above is a tutorial on how to adjust the red light of a laser marking machine. I hope it will be helpful to you.
(The original article of Junchuang Laser has been monitored by the Copyright Protection Center. If you reprint it without permission, you will be held legally responsible.)


